Tuesday, May 26, 2009

New Award


I am so happy to announce that today i received this award for being
COPYRIGHT COMPLIANT
This is truly an honor for me. Thank You very much TheZoneGroups!


Monday, May 25, 2009

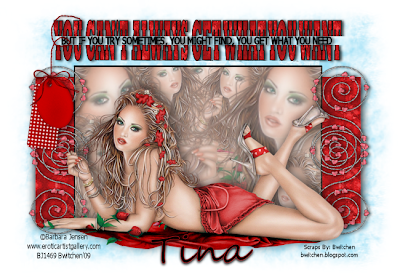
Tutorial: What You Want


What You Want

Created By: Bwitchen May 25th 2009
Any similarities to any other tutorial are purely coincidental.


I am using PaintShop Pro version 12.1
but i am sure this will work with any version.
I am assuming you have a working knowledge of psp.


Supplies:


Tube Info: ©Barbara Jensen www.eroticartistgallery.com
Used with a license
I used ALP-6 Love Bidding Time
and V-1 Bidding Time
Both may be purchased at her above link.

My Supplies >HERE< Let's Begin

1. Open a new image 600 by 400 transparent background.
2. Open and unzip supplies.
3. Save your paper to what ever file you put your patterns in.
Everything else we will be using straight from PSP...
Unless you install your mask to a mask folder.

Okay 1st we will be making your rectangle shapes.

4. To do this with your new image open just press "G" this will open your rectangle tool for use.
Be sure you rectangle color is set to black. Draw out a thinly rectangle (see my tag for reference...the bottom image) Once drawn out go to Objects>Align>Center Of Canvas
Then right click and convert to raster.

5. Once again press G and draw out your 2nd rectangle. Set your color to gray. This one is not going to be as long and taller then the 1st one. (see my tag for reference) Once drawn out go to Objects>Align>Center Of Canvas Then right click and convert to raster.

Now that we have both rectangles, lets add a little color....

6. Click on the bottom longer rectangle layer to activate
Now remember that pattern you saved? We will be using that one.
Go to Effects>texture effects>sculpture
and find the paper labeled Bwitchen_WhatYouWant_Paper1
and apply effect with these settings....
Size: 100 Color: White Smoothness: 0
Depth: 1 Ambiance: 0 Shininess: 0
Angle: 315 Intensity: 53 Elevation: 30

7. hide this layer.

Next we will be adding your image to the top rectangle.

8. Open your tube choice and duplicate it. Hide one copy.

9. Now we will need several copies & different sizes of the same tube.
a) On the unhidden copy of your tube, resize 125% larger,
place to the right of the rectangle
(see my tag for reference)
b) duplicate once.
c) Mirror that copy.

10. Duplicate your hidden tube and unhide one copy.
This one will not be resized. Move it to the top and right of the rectangle and place her
in front of the larger tube. repeat steps 9b & 9c.

11. once again duplicate you hidden tube and move to the top.
resize this tube 85% and move to the right of the rectangle but place her just so she is peeking out behind the largest tube, and move her just below the largest tube. Repeat steps 9b & 9c.
This time move the tube on the left down just a little so her hair isn't covering the other ones mouth.

Merging tubes...

12. Hide both rectangles, and merge visible. Be sure not to unhide your main tube.
13. unhide the gray rectangle and make active, with your magic wand click on it so it has the marching ants. now click on the layer of the girls and go to Selections> Invert, and then on your keyboard click shift & delete at the same time.

14. While your girls image layer is still active & with the marching ants around it go to Selections> invert. Then go to Adjust> Softness> Soft Focus , then again click on shift & delete

15. with the marching ants still running around...Once again click on the gray rectangle to make it active, and go to selections > modify> expand 2, then click on the active layer and right-click and promote selection to layer. Now on your keyboard hit shift & H this will open up you saturation pallet... slide your lightness and saturation down to -100. Bring to the top.

16. Merging Layers Again

Now here is what you should have unhidden...
Your frame (black) on top
Your girls in the middle
Your gray rectangle on bottom

Merge all 3 layers and unhide your red rectangle.

17. Open image Bwitchen_ WhatYouWant_Swirl & Copy & paste it as a new layer.

18. Resize this 45%, duplicate, mirror image & flip, then grab one of the layers and place the open ends together to make one continuous swirl. Merge the 2 layers together, and place to the right of the top rectangle so that the edge of the swirl cuts the top corner of the bottom rectangle. Duplicate again. And flip it. Merge those two layers together.
Thank once again, duplicate them. This time mirror the image. Merge all swirl layers together.

19. Adding your wordart. Open the word art image and copy & paste it just above your top
rectangle.

20. Open and add your hang tag. Resize to 35% and move to the left of the tag.

so now you should have 6 layers total...

1. Your original tube layer
2. One swirl layer
3. The rectangle with the girls
4. The red rectangle
5. Wordart
6. Hang tag

Time To Add Drop Shadows

20. Your main tube image:
Vertical: -2
Horizontal: 2
Opacity: 47
Blur 15.84


21. Click on each of the other 5 individual layers and apply
the same drop shadow with the following settings:
Vertical: -2
Horizontal: 2
Opacity: 47
Blur 3

22. Now add your name with the font of your choice and apply
your drop shadow with the same settings as step 21 above.

23. Add your copyright information.

24. Merge all visible.

Adding Your Mask

25. Add a new layer, send to bottom, flood fill with color of choice.

26. Open the mask image bwitchen.blogspot_Mask1
Go to Layers> New Mask Layer From Image>look for bwitchen.blogspot_Mask1

27. Merge group. Then Merge visible. then is you wish, merge all, and save as JPG
or just merge visible and save as PNG for a transparent background.

Wahlaaaha! You have now finished.
Thank you for trying my tutorial and i hope you've not found it to difficult.

Saturday, May 23, 2009

New Tubes More Monkey Business


Yep, I've been Monkeying around some more.
This little cutie is named Annie.
She is named after my youngest sister Andrea,
we always called her Annie for short. So this one is for her.

(To download this press ctlr & click the image to open in a new window,
then choose right click and save as in your favorite folder... this file is PNG format)


My last freebie for today, flowers for my friends... Enjoy!
(to save hold down ctlr & click on image to enlarge in a new window then right click and save in your favorite tube file...this is PNG format)

New Tubes: Monkey Business


These new tubes are from my Monkey Business line.
Here i have offered 5 different outfit to suit your needs.
Hopefully i will have more of these for everyone to gobble up soon.


(to save hold down ctlr & click on image to enlarge in a new window then right click and save in your favorite tube file...this is PNG format)


New Animal


These little monkeys are just too cute to miss out on!
(to save hold down ctlr & click on image to enlarge in a new window then right click and save in your favorite tube file...this is PNG format)

New Animal


Here's another new animal, I think it's sheepishly cute!
(to save just right click and save in your favorite tube file...this is PNG format)

Friday, May 22, 2009

New Meeble


As promised here is my newest addition to my Mebble collection. I hope everyone likes it.
(To save right click over image and choose save as "PNG")


Creatively Speaking

Well, Creatively Speaking... i have been in a monkeying around kinda mood.
I have been working hard to come up with some cutie's for everyone.
I am sure you will absolutely adore the new addition to my growing animal collection. I also created a new Mebble for those that like the others. I am still thinking on some more to add to that family of fun friends. So keep your eyes peeled cause.
I will be updating as frequently as possible.


Our new group Painted Season's PSP which use to be PSP Classic Paradise is coming along beautifully. I am loving the functionality we have there and am happy being a moderator. If you haven't checked us out yet please do so. It's definitely a fun place to hang out.
Painted Season's PSP

I also have an always list there too. The people on that list will always get a taggie from me.

American Idol Update: well i guess i called that one all wrong. Adam Lambert should have won in my own opinion, and in my heart i know he always will have been the winner. That boy sings flawlessly every single note... Not that i am hating on Kris Allen, cause that boy is cute as shit, but as soon as Allison Iraheta got the boot, i knew that Adam wasn't gonna win. It's a case of hometown boy vs bad boy, everybody wants to think they are the all American good guy, but secretly they wish they had the guts to get up there and rock that stage like Adam Lambert did.

I must say i was definitely floored by the finally of American Idol... I loved seeing Cyndi Lauper , Queen, and even Kiss with Gene Simmons' in his Guitar Hero costume even brought back memories. I was kinda disappointed though that they didn't where their original space boots, those babies were priceless!


Monday, May 11, 2009

New Tubes: Mebbles


We here is my last post for today.
I am calling them "Mebbles" as in my version of weebles by me.
Dunno what you'd use them for, but i am sure you all will come up with something.

(Just click on the image to enlarge, then right click and choose save as "PNG")


New Wordart


Click on images to enlarge then right click and save as PNG.


2 New Templates


Two new templates, a book & bird houses.
(Click on image to enlarge in a new window, then right click and save as PNG.)

More Tubes Animals & Such! Enjoy! click on image to open in a new window, then right click and save as PNG


A New Mask


Here's a new mask. This should be ready to go, just click on image to enlarge and then right click to save in your mask folder.

3 New Tubes created by Me


Well as promised, here are 3 new tubes all Paintshop Pro x2 created by me.
Creatively Speaking: these were a toughie, as i am new to creating tubes this way, and still have alot to learn about shading. Also, i definitely need a lesson in noses. they are the toughest part of the face for me. Anyway, i think these came out way more better then the ones i created
from my hand drawings last year. Hopefully i will be able to produce some more of these for you soon. I did have alot of fun making them.
"Casperella" I got my inspiration of her from Henry Peters. I love is artwork. He specializes in the Indian heritage. I am dedicating this tube to Henry. I dunno if he'll ever see it, none the less, i am still dedicating it to him. Thank you for sharing your artwork. You truly are an inspiration
"Arianna" Here inspiration comes from someone i saw on the show Tough Love. This poor girl as beautiful as she was, could not get her self together to find a man for more then 2 weeks. In the end she got kicked off the show because she just didn't wanna hear what they had to say. She just needed a good long hard look in the mirror. That could have been the best thing for her. Any way.... this is my verson of her.
"Becky"... I dunno, i don't like her at all LOL well, i like her just not her clothing. I wish i would have done something different there, and i may still do that. If i do i will post the next version of her too.

okay, that all about those tubes i feel like i can say. I hope you enjoy. Remember to read my TOU before using.

Download Below:
(click on the name of the tube you'd like to download the zip file)


Arianna Casperella Beckie


Tuesday, May 5, 2009

Creative Update

So, I have been working on some new freebie elements and things. I also have some new tubes I created. I still don't know if i am happy with them or not, but they are done.
I have also been learning about painting in PSP & using warp. I have been a psp user for around 6 or more years now and still i am learning new things... it totally amazes me.

I'll get around to posting the new freebies some time this week. I am not in a rush, as we are moving our group from Paradise to Painted Seasons at Yuku. I have to say, i love the convience of the yuku/photobucket co existence. Wow has it made my life easier.

On the American Idol front we're down to the last few peeps. I must say, i called it good when i picked Allison & Adam. Yep i sure did. I may not be able to carry a tune, but I know a good voice when i hear one, and they definitely have them. I do want to say, i love Danny Gokey to, he was another i chose in the beginning when we were sitting around with the family. Something about him... he gives me goose pimples. But i do think either Allison or Adam will take it in the end. I also was glad to see Matt finally go. Yeah, he might be a cute Justin Timberlake wanna be, but he can't sing in my opinion. I hated it when he played the keyboards in the audience a few weeks back. That turned me right off of him. He i dunno, sound to karaoke for my taste. I'm just glad he's finally gone.

Saturday, April 11, 2009

Purse Template


Just posting another example of the purse template used in a tag.
I think this really turned out cute.

Monday, April 6, 2009

Freebie Easy Tut &Template: Purse


One last freebie for today at least...


Purse Template / Quick Tut

Tube information :
©Keith Garvey www.garvgraphx.com
used with license purchased from
myPSPtubes.com

You too can create the above tag using my newest template just like a pro.
You can do just as i did and color your new purse, or spiff it up by using a pattern.
It is easy to do just use your magic wand & click on each color piece & promote to a new layer, then either color, sculpt, or add a pattern. It's that easy.

Feel free to download below
(included in this zip: purse template, greyscale bow, greyscale doodle, & wordart.)

DOWNLOAD HERE


Freebie Element: IPOD


IPOD

Here's another freebie i just finished up.
It will make a wonderful element to jazz up your tags.

This freebie is in PNG form.
Feel free to snag it right from my blog.

All you have to do is RIGHT CLICK & SAVE!
(note: you must choose to save it before it will work in psp)

Sunday, April 5, 2009

Free Element: Retro Radio


Another Freebie:

Retro Radio

When i showed this radio to my daughter, she said, "what kind of radio is that?"
I just laughed, she said "No seriously Mom,
whats the square on the front with the flowers in it?"
Has it been that long since cassettes were alive?
I guess so... Man those were the days.
So yeah, this radio is now considered retro LOL

This freebie is in PNG form.
Feel free to snag it right from my blog.

All you have to do is RIGHT CLICK & SAVE!
(note: you must choose to save it before it will work in psp)


Freebie Elements: Party Girl Dresses


Another freebie:

Party Girl Dresses
239 x 387 pixels

These elements can be added to your tags
to give them that extra special "Party Pick Up".

Download Here

Freebie Elements: Very Cherry Dresses


Another Freebie:

Very Cherry Dresses

These elements can be used to spice up your tags

Download Here

Enjoy! I have one more post for today...


Freebie Elements: Camo Chick Dress & Hat


Here's another freebie

Camo Chick Dress & Hat Set

These can be used as elements
to add that extra special touch to your creations.

Download Here

More Freebie Templates


Well, i am back with more templates
so you too can create a wonderful tag like mine.

Living Room Templates

In my tag i used the
nightstand, chair, telephone, & picture frame templates

Feel free to download them from the zips below:
(click on the word that represents which item you want)

Chair Telephone Picture-Frame Nightstand

Enjoy! I shall be back with more!


Freebie Templates


Well, i have been working hard to get out some new freebie goodies for everyone.
Here is what i came up with...

Bedroom Templates

You too can create the above tag with this set.
In my tag used the bed, nightstand & rug templates.

Feel free to download them from the zips below:
(just click on each word that represents the item you want)
Bed Nightstand Rug

Enjoy! I have many more goodies to post today, i hope everyone like them.


Thursday, February 26, 2009

Scrap Kit: Purple Paradise


Purple Paradise

Well as promised here is my new scrap kit Purple Paradise.
There are lots of goodies in this kit for everyone to play with.
This kit is so big i had to create an add on pack. So be sure to download that one too!


Download Purple Paradise >HERE<.
Download Purple Paradise Add-On >HERE<.

Wednesday, February 25, 2009

Creatively Speaking Update:

I have been trying to update my blogs background and such.
As you can see i was able to fix up the header to one of my own, but i am still trying to figure out the body, and sides. Anyone got any help? lol

I have also been working hard on getting out a new scrap kit for all of my friends at pspclassicparadise.com This is a great bunch of people, and i feel honored to be creating for everone there. They are the friendliest PSP group out there. SO i am dedicating my 1st blogging scrap kit to them. It will be called Purple Paradise. I am going to try and get it up tomorrow. That depends on how the net is rolling for me. Some days i get streaming service, and others it takes what seems like 15 minutes to load one page.


I got a couple of new tubes today even though i probably shouldn't have, but what the heck, you only live once. I got the new Elias Chatzoudis Pamela(Can you say hot), and the new Keith Garvey Leprecaun(Go Irish!) I love both of them very much, and can't wait to pop out a new tag for everyone. I already created a Member's Spotlight tag for a new section in Paradise. You can see it >HERE< style="font-weight: bold;">On the American Idol Reality front:

Talk about creativity, Nick Mitchell Performance was haliraious! I couldn't stop laughing, and man the boy does have a voice or what? I think we may be hearing more from him on the comedy front, but not in american idol unless America votes him in just to piss off Simon.
16 yr old Allison Iraheta, WOW, this girl blows me away. I loved her rendition of Alone.... it really took me back. I am sure we will be seeing more from her. I also have some love for Megan Joy Corkrey she is just beautiful. Kinda reminds me of my cousin Venus when she was younger. I love those roughness of her voice. kudos to you. I also loved Adam Lambert such a cute kid, and yeah, his pipes are amazing. He's my number one pick to take home the AI title. So my 3 picks to move on are Adam, Allison, and Megan. Good Luck to all three of you.

Okay that my bit for today... See you tomorrow... with some new scraps.

Monday, February 23, 2009

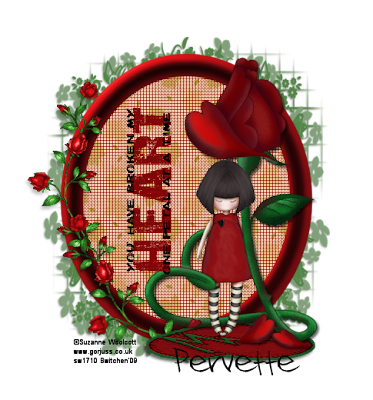
Tutorial: Broken Heart


This tutorial was written by Bwitchen
on Feb. 23, 2009

Any similarities to any other tutorial is purely coincidental.

I am using PaintShop Pro version 12.1
but i am sure this will work with any version.

Supplies:

Tube of choice... I am using the artwork of Suzanne Woolcott with a license.
To purchase a license to use Suzanne's Gorjuss Artwork please visit her site >HERE<

My Supplies
... Found >HERE

(Rainbow Coffi)
This tube below belongs to Rainbow Coffi.
She does not require crediting of this tube unless you are using only her tubes.
(click to enlarge in a new window then right click and save as PNG)


Not Supplied: Mask Of Choice

Let's Begin


1. Open a new image with transparent background in PSP 500 by 500.
2. Open supplies.
3. Copy and paste the frame & hide.
4. Next Paste the HeartfeltRose.
5. Add your tube of choice... place it so it is just over the edge of the roses stem.
6. Duplicate your tube once and move below the rose layer.
7. Go back to your top copy of the tube, add a drop shadow of: v=4, h=2, o=26, b=6
8. Next: lower the opacity of the top tube to 45 so that you can see the rose.
9. Erase the part of the top tube to make it look like she's peeking out from behind the stem.
10. Bring your opacity back up to 100.
11. Now, click on the rose layer & with the selection tool cut out the 2 rose petals, and place as a new layer. Then selections>selection none. Hide this layer.
12. On the rose layer, add a drop shadow of v=4, h=2, o=26, b=6 twice
13. Now merge visible ( both tubes, and the single rose.)
14. Unhide your frame.
15. Resize merged layers to an appropriate size (not including frame), and move just to the right of the frame.
16. Copy and paste your broken heart, just below your tube and rose.
17. Unhide the petals you cut and hide previously. Resize 50% and place near the rose stem.
18. copy and paste you small rose vine (recolored to choice of course. This is why it is in 2 pieces)
19. Rotate 90 to the left and place to the left on the frame.
20. Duplicate the rose vine and rotate it 40 to the left. Then go to adjust>sharpness>sharpen. bring this layer above the previous vine. merge down and add a drop shadow of v=4, h=2, o=26, b=6 twice. Move down below the rose petals.
21. Copy & paste the wordart from the supplies. Rotate left 90, and move to the left of the image.
22. Merge all visible.

Optional:

23. Now if you want a background in your frame:
go to your selection tool and choose eclipse, starting in the center of your creation draw outwards until your eclipse is just outside of the inside frame age. Open a new layer and send to the bottom. flood fill with color choice, or background choice.

24. Merge visible, add mask if desired, add copyright, and name.

Whalah! Your tag is finished.

I hope you have enjoyed this tutorial.


WordArt: One Petal At A Time


Created By Me on Feb. 23, 2009

Download >HERE<

Sunday, February 22, 2009

WordArt: Set 1


Word Art Set#1
Download >Here

Friday, February 20, 2009

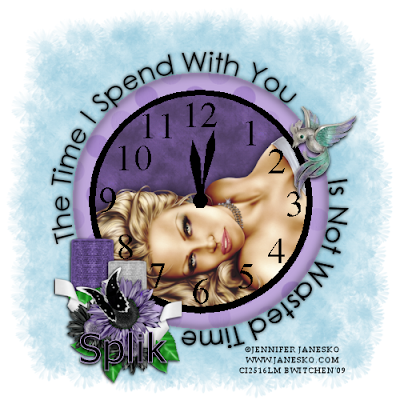
Tutorial: Wasted Time


This tutorial was created by Bwitchen on Feb. 20,2009
any similarities to any other tut is completely coincidental.

I use PSP version 12.01 this tut can be done in any version.
I rate this tut as EASY. A good tut for beginners.

Tag Info:
©Jennifer Janesko www.janesko.com
used with license from
www.cilm.com

Supplies:
Bwitchen_WastedTime_Supplies by me
includes candles, bird, flowerspray, clock face template, clock numbers
Bwitchen_WastedTimeWordart By me

Not supplied: Pattern of choice
Mask Of Choice

Zip File > HERE <

1.Open all supplies in PSP.
2.Open a new image 400 x 400 raster with transparent checked.
3. Copy and paste the solid circle
4. Duplicate this once and hide the bottom copy.
5. Go to effects>texture effects> sculpture and choose a background for your clock face.
6. Copy & paste your clocks numbers.
7. Now choose the tube you want inside of the clocks face and paste it just above your sculptured layered.
8. Add a drop shadow to your tube.
9. Click on your hidden copy of the gray circle with your magic want ( if any parts are outside of the clock)
10. reclick the layer with your tube & choose selections> invert. Then edit>cut
11. Merge Visible.
12. Go to your hidden gray circle, and unhide.
13. Click on this layer & resize it 118 percent.This is the outside of the clock.
14. Go to effects>texture effects> sculpture.
15. with your magic wand, click on the outside of this layer, and choose selections>invert
16. Next go to selections> modify feather by 8.
17. Go to selections> contract by 4.
18. Go to selections> invert.
19. with this layer still selected & inverted, go to effects>3-d effects dropshadow of vertical 0, horizontal 0, opacity 100, blur 10.
20. repeat step 19 for a more dramatic effect.
21. Now add your accessories: the bird, the flowers, the candle(s). Be sure to add a flame to your candle if desired.
22. Add a drop shadow to each of vertical 6, horizonal 2, opacity 31, blur 4.
23. merge visible.
24. copy and paste your WastedTime wordart. Resize if nesseccary.
25. Add a new layer and add your mask. Merge group. then merge visible.
26. Add your copyright & name and whala! You are now finished!


Tuesday, February 10, 2009

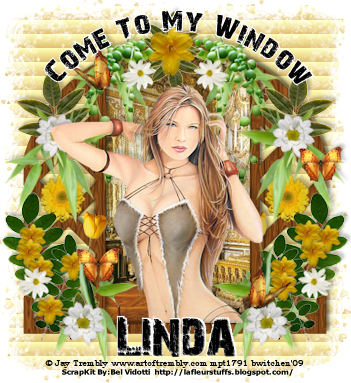
Tutorial: Come To My Window


This tut was created on 2-10-09
Any similarities are purely coincidental.

I use PSP version 12.01 this tut can be done in any version.
I rate this tut as EASY. A good tut for beginners.

The tube is created by : Jay Trembly
www.artoftrembly.com
and is used with a license which I purchased from
www.mypsptubes.com

This artist however has since moved and you may now find his tubes at
www.cilm.com

Supplies:

Sunny Day Scrap Kit from Bel Vidotti
http://lafleurstuffs.blogspot.com/
(to find this in the top left of the blog type Sunny Day in the search box)

My Supplies: >HERE<
Included in my supplies:
Window Tube/Window Tube textured (created by me)

Font: 28 Days Later from http:\\www.DaFont.com

Not Included: Mask Of Choice & Picture Of Choice


~~~~~~~~~~~~~~~~~~~~~~~~~

Ok here we go:

Open all supplies in PSP.

Open a new image 450 x 450

Copy and paste the window image of your choice.

(if you are using the template, add texture by going to:
effects>texture effects> sculpture and choose one from your files)

Placing your choice of picture inside of the window area:

Copy your choice of picture & pasted it in a new layer under the window. Move it around until you are satisfied with where it is set. Next, click inside window layer using your magic wand. Go to Selections>Modify>Expand> by 2. Now go back to the room layer and choose Selections>Invert, next chose Edit>cut.

Placing the girl inside the window:

Copy and paste your tube above the window. Add a drop shadow. Choose the window again, then using your magic wand again click inside the window, go to Selections>Modify>Expand>by 1
Click back to your girl and choose Selections>Invert then erase those parts of the tube you do not want hanging outside your window.

Merge the three layers, and add a drop shadow of choice.
Now your bedroom and girl are inside of the window.

Adding your vegetation:

Open your Bel Vidotti Sunny Day Scrap Kit.

There is no rhyme or reason to this, feel free to to place leaves and flowers as you wish.
I only added drop shadows to the flowers and butterflies to make them stand out a little, you can add them however you wish too.

Next merge all visible layers.

Adding your Background Mask:

Now that all other layers are merged. Add another layer, drag it below your window, and fill it in with white. Now go to Effects>Texture Effects> Sculpture> and choose how the outside of your house will look. Then go to Effects>Texture Effects> Blinds this will create siding for your home. Using which ever settings you feel are appropriate. Now choose a mask from your own supplies, and apply it to this layer, and merge group.

Add your copyright & name. Finish by merging visible and save as a PNG.

As you notice, i did not merve all & flatten, when you do you will have a background. I choose PNG so that i do not have one, and the tag can change depending on the background color of the page you place it on.

Congratulations... you can now Come To My Window!


Wednesday, February 4, 2009

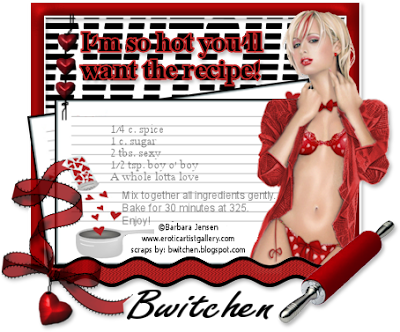
My Recipe Tut


My Recipe Tut

This tut was created on 2-2-09 for my friend Freshy.
Any similarities are purely coincidental.

I use PSP version 12.01 this tut can be done in any version.
I rate this tut as EASY. A good tut for beginners.


The tube i used is from: Barbara Jensen
It is one of her FTU tubes, to download it please go to
http://www.eroticartistgallery.com
and scroll till you see the free tube link.

My supplies >Here<

Included in my supplies:

Rolling pin, ric-rac, bow, recipe cards, and hearts.

Fonts Used: (can be found at dafont.com)
DelliniaUPC
Freestyle Script
Former Airline


okay here we go:

Open a new image 450 x 450 in PSP.

Open supplies named: Bwitchen_Tut_MyRecipe

First the frame:
Using your rectangle vector tool with these settings: solid line, width 15 color:( i dipped a red from Paris' outfit ) and draw out your frame. convert it to raster, and then using you magic wand click on it, and expand by 3. create a new layer below the frame and flood fill it with white. Deselect all.
Go back to the red frame and bevel it with these settings: Bevel #2, Width 9, Smoothness 100, Depth 19, Ambience 10, Shininess 35, Angle 325, Intensity 27, Elevation 58.

Next The Recipe Cards:
Crop your recipe card from the png supplied. Paste as a new layer and reduce the size by 75%. Duplicate this once. With the move/pick tool pick the bottom recipe card and rotate it just a little so you can see it peeking out from below the top card. Add a drop shadow of: vertical 3, horizontal 2, opacity 31, blur 6. Merge both cards together.

Now add your own recipe to the cards... be sure to include all the ingredients that YOU consist of.

Now place your ric-rac, bow, hearts, rolling pin, and wordart. add the same drop shadow to all as before.

Merge visible, now use your former airline font and create your name. move it below your merged image and stretch it out behind the the tag at the top. covert it to raster. merge visible.

Add your name & copyright information. merge all one last time and save as png.