Thursday, February 26, 2009

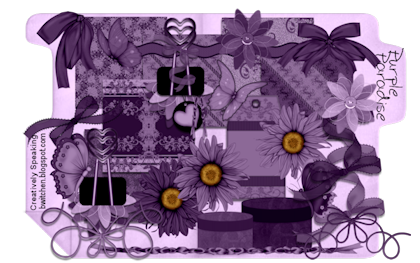
Scrap Kit: Purple Paradise


Purple Paradise

Well as promised here is my new scrap kit Purple Paradise.
There are lots of goodies in this kit for everyone to play with.
This kit is so big i had to create an add on pack. So be sure to download that one too!


Download Purple Paradise >HERE<.
Download Purple Paradise Add-On >HERE<.

Wednesday, February 25, 2009

Creatively Speaking Update:

I have been trying to update my blogs background and such.
As you can see i was able to fix up the header to one of my own, but i am still trying to figure out the body, and sides. Anyone got any help? lol

I have also been working hard on getting out a new scrap kit for all of my friends at pspclassicparadise.com This is a great bunch of people, and i feel honored to be creating for everone there. They are the friendliest PSP group out there. SO i am dedicating my 1st blogging scrap kit to them. It will be called Purple Paradise. I am going to try and get it up tomorrow. That depends on how the net is rolling for me. Some days i get streaming service, and others it takes what seems like 15 minutes to load one page.


I got a couple of new tubes today even though i probably shouldn't have, but what the heck, you only live once. I got the new Elias Chatzoudis Pamela(Can you say hot), and the new Keith Garvey Leprecaun(Go Irish!) I love both of them very much, and can't wait to pop out a new tag for everyone. I already created a Member's Spotlight tag for a new section in Paradise. You can see it >HERE< style="font-weight: bold;">On the American Idol Reality front:

Talk about creativity, Nick Mitchell Performance was haliraious! I couldn't stop laughing, and man the boy does have a voice or what? I think we may be hearing more from him on the comedy front, but not in american idol unless America votes him in just to piss off Simon.
16 yr old Allison Iraheta, WOW, this girl blows me away. I loved her rendition of Alone.... it really took me back. I am sure we will be seeing more from her. I also have some love for Megan Joy Corkrey she is just beautiful. Kinda reminds me of my cousin Venus when she was younger. I love those roughness of her voice. kudos to you. I also loved Adam Lambert such a cute kid, and yeah, his pipes are amazing. He's my number one pick to take home the AI title. So my 3 picks to move on are Adam, Allison, and Megan. Good Luck to all three of you.

Okay that my bit for today... See you tomorrow... with some new scraps.

Monday, February 23, 2009

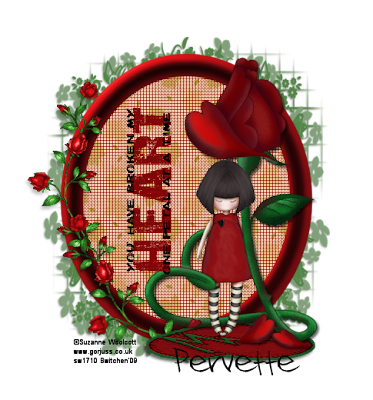
Tutorial: Broken Heart


This tutorial was written by Bwitchen
on Feb. 23, 2009

Any similarities to any other tutorial is purely coincidental.

I am using PaintShop Pro version 12.1
but i am sure this will work with any version.

Supplies:

Tube of choice... I am using the artwork of Suzanne Woolcott with a license.
To purchase a license to use Suzanne's Gorjuss Artwork please visit her site >HERE<

My Supplies
... Found >HERE

(Rainbow Coffi)
This tube below belongs to Rainbow Coffi.
She does not require crediting of this tube unless you are using only her tubes.
(click to enlarge in a new window then right click and save as PNG)


Not Supplied: Mask Of Choice

Let's Begin


1. Open a new image with transparent background in PSP 500 by 500.
2. Open supplies.
3. Copy and paste the frame & hide.
4. Next Paste the HeartfeltRose.
5. Add your tube of choice... place it so it is just over the edge of the roses stem.
6. Duplicate your tube once and move below the rose layer.
7. Go back to your top copy of the tube, add a drop shadow of: v=4, h=2, o=26, b=6
8. Next: lower the opacity of the top tube to 45 so that you can see the rose.
9. Erase the part of the top tube to make it look like she's peeking out from behind the stem.
10. Bring your opacity back up to 100.
11. Now, click on the rose layer & with the selection tool cut out the 2 rose petals, and place as a new layer. Then selections>selection none. Hide this layer.
12. On the rose layer, add a drop shadow of v=4, h=2, o=26, b=6 twice
13. Now merge visible ( both tubes, and the single rose.)
14. Unhide your frame.
15. Resize merged layers to an appropriate size (not including frame), and move just to the right of the frame.
16. Copy and paste your broken heart, just below your tube and rose.
17. Unhide the petals you cut and hide previously. Resize 50% and place near the rose stem.
18. copy and paste you small rose vine (recolored to choice of course. This is why it is in 2 pieces)
19. Rotate 90 to the left and place to the left on the frame.
20. Duplicate the rose vine and rotate it 40 to the left. Then go to adjust>sharpness>sharpen. bring this layer above the previous vine. merge down and add a drop shadow of v=4, h=2, o=26, b=6 twice. Move down below the rose petals.
21. Copy & paste the wordart from the supplies. Rotate left 90, and move to the left of the image.
22. Merge all visible.

Optional:

23. Now if you want a background in your frame:
go to your selection tool and choose eclipse, starting in the center of your creation draw outwards until your eclipse is just outside of the inside frame age. Open a new layer and send to the bottom. flood fill with color choice, or background choice.

24. Merge visible, add mask if desired, add copyright, and name.

Whalah! Your tag is finished.

I hope you have enjoyed this tutorial.


WordArt: One Petal At A Time


Created By Me on Feb. 23, 2009

Download >HERE<

Sunday, February 22, 2009

WordArt: Set 1


Word Art Set#1
Download >Here

Friday, February 20, 2009

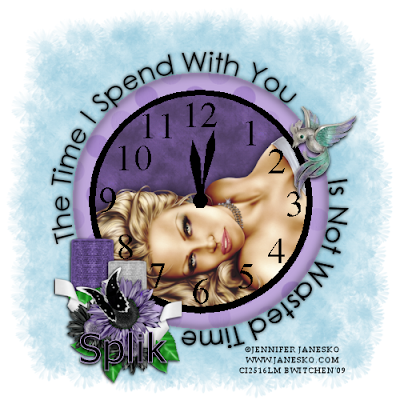
Tutorial: Wasted Time


This tutorial was created by Bwitchen on Feb. 20,2009
any similarities to any other tut is completely coincidental.

I use PSP version 12.01 this tut can be done in any version.
I rate this tut as EASY. A good tut for beginners.

Tag Info:
©Jennifer Janesko www.janesko.com
used with license from
www.cilm.com

Supplies:
Bwitchen_WastedTime_Supplies by me
includes candles, bird, flowerspray, clock face template, clock numbers
Bwitchen_WastedTimeWordart By me

Not supplied: Pattern of choice
Mask Of Choice

Zip File > HERE <

1.Open all supplies in PSP.
2.Open a new image 400 x 400 raster with transparent checked.
3. Copy and paste the solid circle
4. Duplicate this once and hide the bottom copy.
5. Go to effects>texture effects> sculpture and choose a background for your clock face.
6. Copy & paste your clocks numbers.
7. Now choose the tube you want inside of the clocks face and paste it just above your sculptured layered.
8. Add a drop shadow to your tube.
9. Click on your hidden copy of the gray circle with your magic want ( if any parts are outside of the clock)
10. reclick the layer with your tube & choose selections> invert. Then edit>cut
11. Merge Visible.
12. Go to your hidden gray circle, and unhide.
13. Click on this layer & resize it 118 percent.This is the outside of the clock.
14. Go to effects>texture effects> sculpture.
15. with your magic wand, click on the outside of this layer, and choose selections>invert
16. Next go to selections> modify feather by 8.
17. Go to selections> contract by 4.
18. Go to selections> invert.
19. with this layer still selected & inverted, go to effects>3-d effects dropshadow of vertical 0, horizontal 0, opacity 100, blur 10.
20. repeat step 19 for a more dramatic effect.
21. Now add your accessories: the bird, the flowers, the candle(s). Be sure to add a flame to your candle if desired.
22. Add a drop shadow to each of vertical 6, horizonal 2, opacity 31, blur 4.
23. merge visible.
24. copy and paste your WastedTime wordart. Resize if nesseccary.
25. Add a new layer and add your mask. Merge group. then merge visible.
26. Add your copyright & name and whala! You are now finished!


Tuesday, February 10, 2009

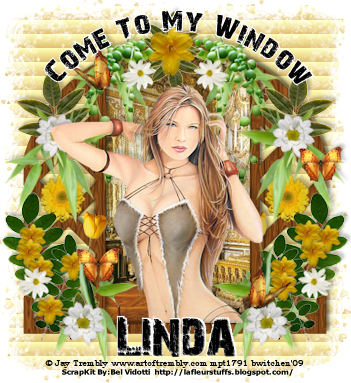
Tutorial: Come To My Window


This tut was created on 2-10-09
Any similarities are purely coincidental.

I use PSP version 12.01 this tut can be done in any version.
I rate this tut as EASY. A good tut for beginners.

The tube is created by : Jay Trembly
www.artoftrembly.com
and is used with a license which I purchased from
www.mypsptubes.com

This artist however has since moved and you may now find his tubes at
www.cilm.com

Supplies:

Sunny Day Scrap Kit from Bel Vidotti
http://lafleurstuffs.blogspot.com/
(to find this in the top left of the blog type Sunny Day in the search box)

My Supplies: >HERE<
Included in my supplies:
Window Tube/Window Tube textured (created by me)

Font: 28 Days Later from http:\\www.DaFont.com

Not Included: Mask Of Choice & Picture Of Choice


~~~~~~~~~~~~~~~~~~~~~~~~~

Ok here we go:

Open all supplies in PSP.

Open a new image 450 x 450

Copy and paste the window image of your choice.

(if you are using the template, add texture by going to:
effects>texture effects> sculpture and choose one from your files)

Placing your choice of picture inside of the window area:

Copy your choice of picture & pasted it in a new layer under the window. Move it around until you are satisfied with where it is set. Next, click inside window layer using your magic wand. Go to Selections>Modify>Expand> by 2. Now go back to the room layer and choose Selections>Invert, next chose Edit>cut.

Placing the girl inside the window:

Copy and paste your tube above the window. Add a drop shadow. Choose the window again, then using your magic wand again click inside the window, go to Selections>Modify>Expand>by 1
Click back to your girl and choose Selections>Invert then erase those parts of the tube you do not want hanging outside your window.

Merge the three layers, and add a drop shadow of choice.
Now your bedroom and girl are inside of the window.

Adding your vegetation:

Open your Bel Vidotti Sunny Day Scrap Kit.

There is no rhyme or reason to this, feel free to to place leaves and flowers as you wish.
I only added drop shadows to the flowers and butterflies to make them stand out a little, you can add them however you wish too.

Next merge all visible layers.

Adding your Background Mask:

Now that all other layers are merged. Add another layer, drag it below your window, and fill it in with white. Now go to Effects>Texture Effects> Sculpture> and choose how the outside of your house will look. Then go to Effects>Texture Effects> Blinds this will create siding for your home. Using which ever settings you feel are appropriate. Now choose a mask from your own supplies, and apply it to this layer, and merge group.

Add your copyright & name. Finish by merging visible and save as a PNG.

As you notice, i did not merve all & flatten, when you do you will have a background. I choose PNG so that i do not have one, and the tag can change depending on the background color of the page you place it on.

Congratulations... you can now Come To My Window!


Wednesday, February 4, 2009

My Recipe Tut


My Recipe Tut

This tut was created on 2-2-09 for my friend Freshy.
Any similarities are purely coincidental.

I use PSP version 12.01 this tut can be done in any version.
I rate this tut as EASY. A good tut for beginners.


The tube i used is from: Barbara Jensen
It is one of her FTU tubes, to download it please go to
http://www.eroticartistgallery.com
and scroll till you see the free tube link.

My supplies >Here<

Included in my supplies:

Rolling pin, ric-rac, bow, recipe cards, and hearts.

Fonts Used: (can be found at dafont.com)
DelliniaUPC
Freestyle Script
Former Airline


okay here we go:

Open a new image 450 x 450 in PSP.

Open supplies named: Bwitchen_Tut_MyRecipe

First the frame:
Using your rectangle vector tool with these settings: solid line, width 15 color:( i dipped a red from Paris' outfit ) and draw out your frame. convert it to raster, and then using you magic wand click on it, and expand by 3. create a new layer below the frame and flood fill it with white. Deselect all.
Go back to the red frame and bevel it with these settings: Bevel #2, Width 9, Smoothness 100, Depth 19, Ambience 10, Shininess 35, Angle 325, Intensity 27, Elevation 58.

Next The Recipe Cards:
Crop your recipe card from the png supplied. Paste as a new layer and reduce the size by 75%. Duplicate this once. With the move/pick tool pick the bottom recipe card and rotate it just a little so you can see it peeking out from below the top card. Add a drop shadow of: vertical 3, horizontal 2, opacity 31, blur 6. Merge both cards together.

Now add your own recipe to the cards... be sure to include all the ingredients that YOU consist of.

Now place your ric-rac, bow, hearts, rolling pin, and wordart. add the same drop shadow to all as before.

Merge visible, now use your former airline font and create your name. move it below your merged image and stretch it out behind the the tag at the top. covert it to raster. merge visible.

Add your name & copyright information. merge all one last time and save as png.