What You WantCreated By: Bwitchen May 25th 2009
Any similarities to any other tutorial are purely coincidental.
I am using PaintShop Pro version 12.1
but i am sure this will work with any version.
I am assuming you have a working knowledge of psp.
Supplies:Tube Info: ©Barbara Jensen
www.eroticartistgallery.comUsed with a license
I used ALP-6 Love Bidding Time
and V-1 Bidding Time
Both may be purchased at her above link.
My Supplies >
HERE< Let's Begin
1. Open a new image 600 by 400 transparent background.
2. Open and unzip supplies.
3. Save your paper to what ever file you put your patterns in.
Everything else we will be using straight from PSP...
Unless you install your mask to a mask folder.
Okay 1st we will be making your rectangle shapes.
4. To do this with your new image open just press "G" this will open your rectangle tool for use.
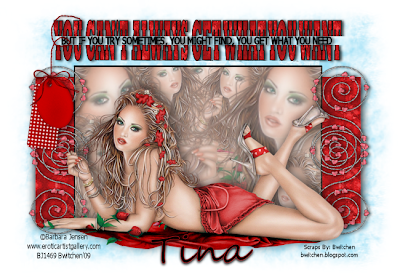
Be sure you rectangle color is set to black. Draw out a thinly rectangle (see my tag for reference...the bottom image) Once drawn out go to Objects>Align>Center Of Canvas
Then right click and convert to raster.
5. Once again press G and draw out your 2nd rectangle. Set your color to gray. This one is not going to be as long and taller then the 1st one. (see my tag for reference) Once drawn out go to Objects>Align>Center Of Canvas Then right click and convert to raster.
Now that we have both rectangles, lets add a little color....6. Click on the bottom longer rectangle layer to activate
Now remember that pattern you saved? We will be using that one.
Go to Effects>texture effects>sculpture
and find the paper labeled Bwitchen_WhatYouWant_Paper1
and apply effect with these settings....
Size: 100 Color: White Smoothness: 0
Depth: 1 Ambiance: 0 Shininess: 0
Angle: 315 Intensity: 53 Elevation: 30
7. hide this layer.
Next we will be adding your image to the top rectangle.8. Open your tube choice and duplicate it. Hide one copy.
9. Now we will need several copies & different sizes of the same tube.
a) On the unhidden copy of your tube, resize 125% larger,
place to the right of the rectangle
(see my tag for reference)
b) duplicate once.
c) Mirror that copy.
10. Duplicate your hidden tube and unhide one copy.
This one will not be resized. Move it to the top and right of the rectangle and place her
in front of the larger tube. repeat steps 9b & 9c.
11. once again duplicate you hidden tube and move to the top.
resize this tube 85% and move to the right of the rectangle but place her just so she is peeking out behind the largest tube, and move her just below the largest tube. Repeat steps 9b & 9c.
This time move the tube on the left down just a little so her hair isn't covering the other ones mouth.
Merging tubes...12. Hide both rectangles, and merge visible. Be sure not to unhide your main tube.
13. unhide the gray rectangle and make active, with your magic wand click on it so it has the marching ants. now click on the layer of the girls and go to Selections> Invert, and then on your keyboard click shift & delete at the same time.
14. While your girls image layer is still active & with the marching ants around it go to Selections> invert. Then go to Adjust> Softness> Soft Focus , then again click on shift & delete
15. with the marching ants still running around...Once again click on the gray rectangle to make it active, and go to selections > modify> expand 2, then click on the active layer and right-click and promote selection to layer. Now on your keyboard hit shift & H this will open up you saturation pallet... slide your lightness and saturation down to -100. Bring to the top.
16. Merging Layers Again
Now here is what you should have unhidden...
Your frame (black) on top
Your girls in the middle
Your gray rectangle on bottom
Merge all 3 layers and unhide your red rectangle.
17. Open image Bwitchen_ WhatYouWant_Swirl & Copy & paste it as a new layer.
18. Resize this 45%, duplicate, mirror image & flip, then grab one of the layers and place the open ends together to make one continuous swirl. Merge the 2 layers together, and place to the right of the top rectangle so that the edge of the swirl cuts the top corner of the bottom rectangle. Duplicate again. And flip it. Merge those two layers together.
Thank once again, duplicate them. This time mirror the image. Merge all swirl layers together.
19. Adding your wordart. Open the word art image and copy & paste it just above your top
rectangle.
20. Open and add your hang tag. Resize to 35% and move to the left of the tag.
so now you should have 6 layers total...1. Your original tube layer
2. One swirl layer
3. The rectangle with the girls
4. The red rectangle
5. Wordart
6. Hang tag
Time To Add Drop Shadows20. Your main tube image:
Vertical: -2
Horizontal: 2
Opacity: 47
Blur 15.84
21. Click on each of the other 5 individual layers and apply
the same drop shadow with the following settings:
Vertical: -2
Horizontal: 2
Opacity: 47
Blur 3
22. Now add your name with the font of your choice and apply
your drop shadow with the same settings as step 21 above.
23. Add your copyright information.
24. Merge all visible.
Adding Your Mask25. Add a new layer, send to bottom, flood fill with color of choice.
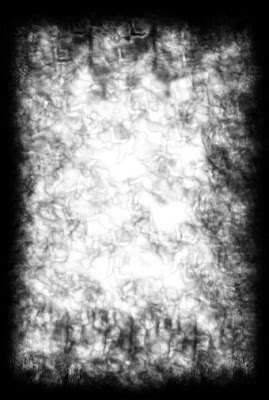
26. Open the mask image bwitchen.blogspot_Mask1
Go to Layers> New Mask Layer From Image>look for bwitchen.blogspot_Mask1
27. Merge group. Then Merge visible. then is you wish, merge all, and save as JPG
or just merge visible and save as PNG for a transparent background.
Wahlaaaha! You have now finished.
Thank you for trying my tutorial and i hope you've not found it to difficult.


 Two new templates, a book & bird houses.


 There are so many wonderful sites out there that offer new and exciting fun stuff for us to do, below are just a few i frequent. Please stop by these sites also, and don't be afraid to tell 'em Bwitchen sent ya!
Also would you like your site added to my list? Feel free to leave me a link in by chat box above or email it to me, and i will happily add it for you!