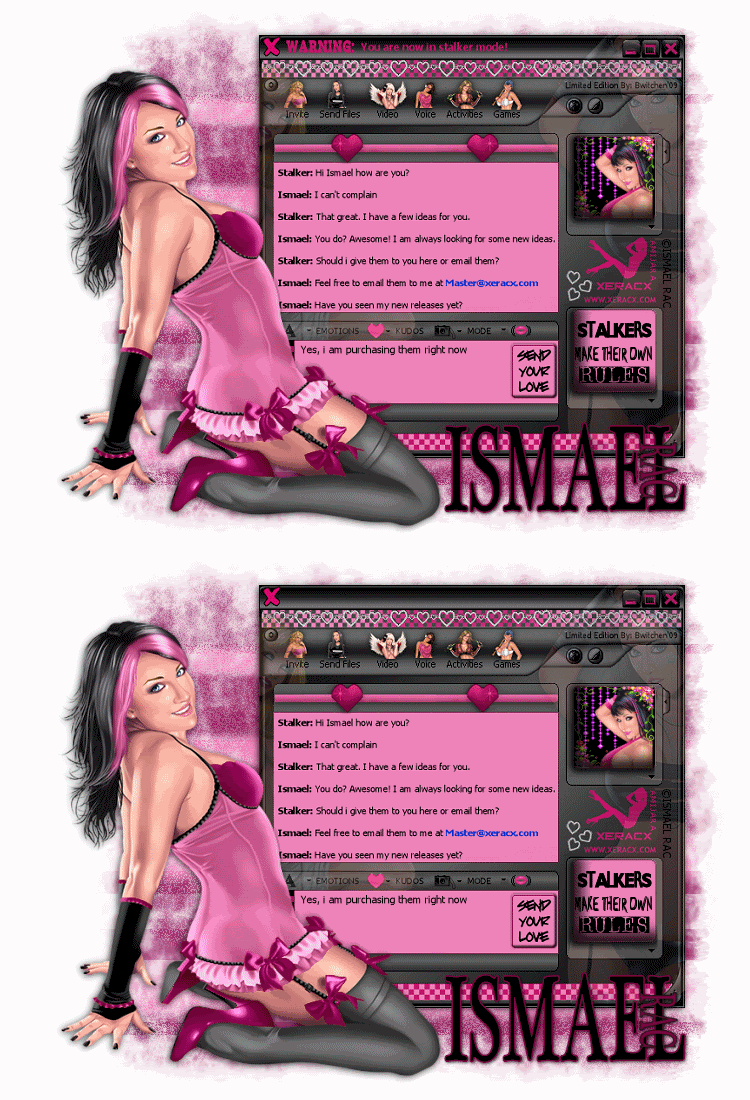
"OMG i gotta have it!"Well, here's your chance to create your very own Stalking Chat Box!
ATTENTION STALKERS:PLEASE EMAIL ME YOUR FINISHED TAGS
AS I WOULD LOVE TO SEE WHAT YOU'VE DONE WITH THIS TUTORIAL.I am holding my own personal contest.
One person from those that
EMAIL ME their tags will be chosen randomly
to receive ONE FREE TUBE of choice from
Ismael Rac's tube collection over at
ArtisticMinds,Inc.(be sure to remember to attach your tags!)
This contest will only be opened until Wednesday September 9, 2009.
I will notify the winner by email on Thursday September 10,2009.
ANY TAG NOT COPYRIGHT COMPLIANT WILL AUTOMATICALLY BE DISCOUNTED.
(Numbers assigned to each individual as emails are received and then will be thrown into a hat and one name drawn.) You may only enter ONE time.

This tutorial has been created by me, Bwitchen, on September 1, 2009
any similarities to any other tutorial is just dumb luck.
Tube Information: ©Ismael Rac
www.xeracx.comPurchased and used with a license from
AMI.
As ALWAYS please be copyright compliant when using this or others tutorials.
Supplies need:Paintshop Pro ( any version will work)
Animationshop 3
8 to 10 Tubes of Choice created by the same artist
3 or 4 fonts of choice
Mask of Choice
My Chat Box (In Grey Scale)My Chat Box (Grey Scale No Words)***Please note, you can choose to use as many or as little options as possible. Feel free to use your own creativity to make this tutorial your own. This tutorial is merely a guideline, and does not have to be followed to a T. Okay lets get crackalackin!
~~~~~~~~~~~~~~
1. Open a new image 700 by 500
2. Open your chat box. copy & paste into your new image.
3. Colourize your chat box to a color of choice by clicking shift + L, and
adding your colour.
4. Now open your tubes.
5. Choose 2 tubes and copy and paste them as new layers to your image.
6. Move them to the left & right sides of your chat box.
7. Lighten the transparency down to 35.
8. make the chat box layer active, and using your magic wand click outside the box. Go to selections and invert. Then activate the layer with the girls and choose selections invert again, and remove the parts of the girls hanging over.
9. Using your magic wand (with these settings add> RGB value> tolerance 0> contiguous checked > feather 1) click on all the empty parts of the chatbox
( message areas & user photo areas) then go to edit & cut those parts out.
Now Adding IconsOpen 5 images of the same artist.
10. a. Copy one tube and paste it as a new layer
b. cut and resize it ( i resized to 12 %) so it fits over top of one of the words at the top of the chat box
(Invite, stalk, video, voice and games)
c. add a slight drop shadow of: 0, 0, 79, 17.
11. repeat step 10a thru 10c until all the words have used all 5 icons above all the words.
Adding "your Photo"Okay, here you can play a little, you can either choose a tube or a tag to put in your photo box
(the top little square)
12a.
If choosing tube: copy & paste your tube as a new layer... resize it so it fits how you would like it inside of the box. Now activate the chat box layer and with your magic wand (same setting as before) click the photo box. Now activate your tube, and invert the selection and cut off all excess. Now your "photo" is finished.
12 b.
If choosing a tag: Open your tag & copy it. Activate the chat box layer & click inside the photo box... now add a new layer and paste your tag into the selection.
The Bottom Photo box13. Here too you can play around. You can add another photo, or insert text just as i did.
To add a photo or tag repeat steps 12a & 12b.
The Chat Box14. Here i used the font Tahoma size 8. This is where your creativity really comes in.
What conversation would you have with your artist? I am all about informing people how easy it is to communicate with the artists, and letting them know that they may email them with their ideas. It's a great way not only to show your support of the artist, but allow others to learn about how to contact them. You may feel free to copy my chat, or create your own. It's totally up to you.
Adding your Bling15. Now what kinda chat box do you like... i added bling to mine, by adding the checker boarding & hearts. Be creative here too. I have left the top line & bottom line of the chat box blank for you to add your images and whatnot's here.
16. Add your copyright info (not your name) & make it visible. Who wants to strain to see the info? Not me. My eyesight is weak, and copyright info should be able to be read by all! Be proud of your artist & show it!
17. Merge all your visible layers.
18. Add a new layer and send it to the bottom. Flood fill with white.
Duplicate it once, then flood fill with a colour of choosing.
19. Choose your mask & merge the group.
20. Once again merge visible. Duplicate this once & hide bottom layer.
21. Now add your warning text at the top of the chat box. Convert to raster, and merge with the layer below it.
22. Add Main Girl... and add a slight dropshadow of choosing.
23. Add your name. Duplicate twice. Merge one copy with each of the layers.
Animationshop24. Open animation shop and copy each of the layers over. Pasting the 2nd one after the 1st one.
25. Now click on frame 1 and press ctlr & A at the same time to select all.
26. Now press alt & enter at the same time to open your frame properties, and adjust your frame settings to 40.
27. Review your animation. Once satisfied, save it!
Your done!
YOU NOW HAVE YOUR OFFICIAL STALKER CHAT BOX!WOOOHOO!